

Honda paint is notoriously thin and soft. The factory clear coat on 8th, 9th, and 10th generation Civics measures approximately 90–110 microns total — with only 30–35 microns of clear coat on top. Aggressive polishing or wet sanding can burn through the clear coat in seconds, especially on the sharp edges of Civic body panels. The plastic headlight lenses yellow and oxidize within 3–4 years without proper UV protection, cutting light output by up to 50%. This guide covers when to polish, when to wet sand, when to stop, and how to protect your work so it lasts.
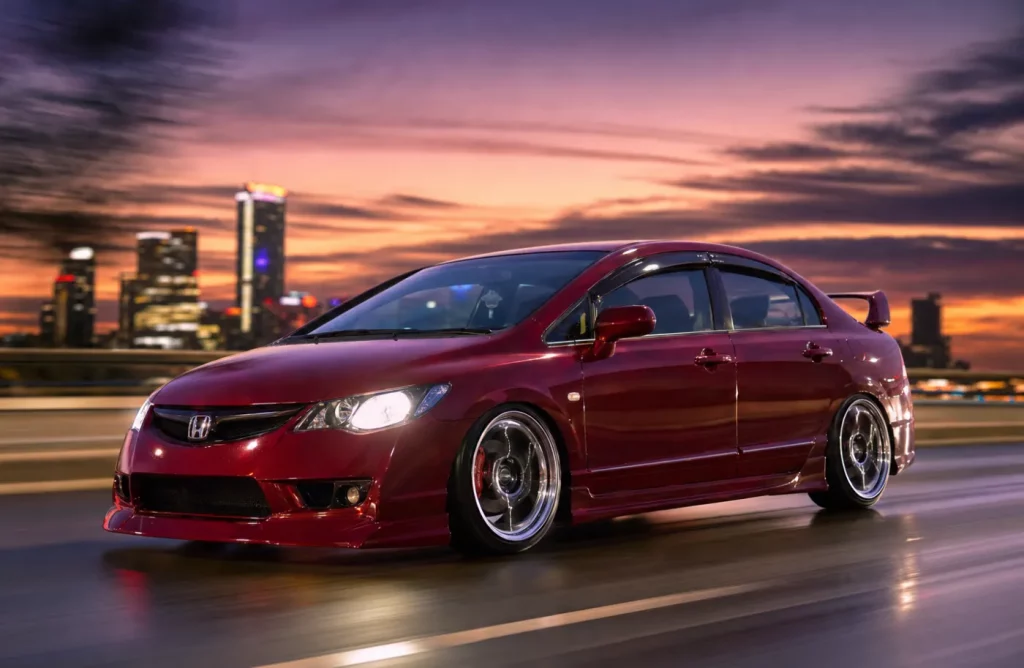
The most important rule of Civic paint correction: Honda clear coat is thin and soft. Do not chase every single defect until the panel looks perfect. A 90% correction that preserves clear coat is better than a 100% correction that burns through to the base coat. On a Civic, less is often more.
Quick Answer — Paint Correction or Headlight Restoration?
| Problem | Solution |
|---|---|
| Light wash swirls | Polish with finishing pad |
| Deeper scratches (fingernail does not catch) | Compound + polish |
| Scratches (fingernail catches) | Limited wet sanding (1500-3000 grit) + compound + polish — only if clear coat thickness allows |
| Clear coat peeling/flaking | Correction will not fix — repaint required |
| Oxidized/yellow headlights | Wet sand + polish + UV protection (2K clear, ceramic, or PPF) |
| Cracked headlight lenses | Replace — restoration will not fix cracks |
| Moisture inside headlight housing | Diagnose seal — external restoration will not fix |
The bottom line: Always start with the least aggressive method. Try a finishing polish first. If that does not work, try a medium polish. Only escalate to compound and wet sanding if the defect genuinely requires it. On a Civic, removing clear coat unnecessarily is a mistake you cannot undo.
Honda Paint — What You Are Working With
Honda’s factory paint is thin and soft compared to German or American brands. The average total paint thickness on a Civic is 90–110 microns. The clear coat layer is only 30–35 microns. For context, a single sheet of paper is approximately 100 microns thick.
Why this matters:
- Aggressive compounding removes 2-5 microns of clear coat per pass
- Wet sanding with 1500-grit can remove 5-10 microns
- You have only 30-35 microns of clear coat total
- Burn through to the base coat requires a repaint of the entire panel
- Edges, body lines, and raised contours have even less clear coat
Generation differences:
- 8th Gen (2006–2011): Paint is soft and prone to oxidation and Clear Coat Failure on dark colors. UV damage is common on hoods and roofs. Many cars have thin clear coat from the factory and multiple years of sun exposure.
- 9th Gen (2012–2015): Slightly harder clear coat than 8th gen, but still soft by industry standards. Dark colors show swirls easily. Some clear coat failure reported on 2012-2013 models.
- 10th Gen (2016–2021): Thin factory paint with visible orange peel. Hoods and front bumpers are prone to rock chips. Dealer-installed swirls are common on 2016-2018 models. Some clear coat peeling reported on 2019 Si and later models.
- 11th Gen (2022+): Newer paint formulations but still thin. Most 11th gen Civics have minimal defects — a light polish and protection is usually sufficient.
Paint thickness rule: If you do not have a paint thickness gauge, assume the clear coat is thinner than you think. Do not wet sand a Civic without measuring or without a very compelling reason.
What You Need — Tools and Consumables
For paint correction:
- Dual-action (DA) polisher — 9-15mm throw. Safer than a rotary for Honda clear coat.
- Microfiber cutting pads — for heavy defects
- Medium foam polishing pads — for one-step corrections
- Finishing foam pads — for final polish and jeweling
- Compound — Menzerna 400, Sonax CutMax, Meguiar’s M105
- Polish — Menzerna 3000, Sonax Perfect Finish, Meguiar’s M205
- IPA/panel wipe — CarPro Eraser or 70% isopropyl alcohol
- Masking tape — 3M automotive masking tape
- Microfiber towels — short pile for removal, long pile for buffing
- Clay bar and lubricant
- Iron remover (CarPro IronX or similar)
For headlight restoration:
- Wet sanding paper — 800, 1000, 1500, 2000, 2500, 3000 grit (3M Trizact recommended)
- Sanding block — soft foam-backed
- Felt or wool pad for compounding
- Heavy-cut compound
- Finishing polish
- UV protection — 2K clear coat, ceramic coating (CarPro DLUX), or PPF
- Masking tape (for surrounding paint protection)
Do not use: Rotary polisher if you are a beginner. Cheap sandpaper with inconsistent grit. Universal clear coat from a hardware store. Any product that contains silicone on painted surfaces.
Paint Decontamination — Before You Start Polishing
Polishing a dirty car spreads contaminants across the paint and creates new scratches. The decontamination process removes bonded contamination so the polish can work on the paint, not on the dirt.
- Wash: Two-bucket method with a pH-neutral shampoo.
- Iron remover: Spray on the paint, let it react (turns purple/red), rinse off. Removes brake dust and rail dust embedded in the clear coat.
- Tar remover: Removes road tar and tree sap.
- Clay bar: Lubricate the surface and clay the paint. The clay removes bonded contamination that washing cannot remove.
- Dry: Use a clean microfiber drying towel.
- IPA wipe: Remove any remaining residue before polishing.
Do not skip clay: Polishing a car that has not been clayed will cause the contaminants to scratch the paint as the pad rotates.
Paint Correction — Step by Step
Step 1 — Tape the trim: Mask all edges, rubber seals, window trim, washer nozzles, and matte black plastic. Polish residue is difficult to remove from textured plastic and can leave permanent white marks.
Step 2 — Test spot: Choose a 2×2 foot area on the Hood or trunk. Start with the least aggressive combination — a finishing pad and finishing polish. If the defect is removed, use that combination for the whole car. Do not start with a cutting pad and compound unless the test spot proves it is necessary.
Step 3 — Polishing technique:
- Work in 2×2 foot sections
- Apply 4-5 pea-sized dots of polish to the pad
- Spread the polish on the panel AT speed 1-2
- Increase speed to 4-5 and work the polish with overlapping passes (cross-hatch pattern)
- Keep the pad flat on the surface
- Do not press down hard — let the pad and polish do the work
- Check the temperature of the panel with your hand — it should be warm, not hot
- Wipe off the residue with a clean microfiber towel
- Inspect the section with a bright LED light
Step 4 — Compound (if needed): If the finishing polish does not remove the defects, step up to a cutting pad and a compound. Use the same technique. After compounding, follow with a finishing polish to remove any haze left by the compound.
Step 5 — IPA wipe: After polishing, wipe the entire car with an IPA solution (50% isopropyl alcohol, 50% water) or a dedicated panel wipe. This removes polishing oils and reveals the true condition of the paint before applying protection.
When to Stop — The Safe Ceiling
The goal of paint correction on a Civic is not 100% defect removal. The goal is maximum visual improvement while preserving as much clear coat as possible.
Stop if:
- 80-90% of the swirls are removed
- The paint looks significantly better than when you started
- You are starting to see primer or base coat on edges or body lines
- You have already made 2-3 passes with a cutting pad
- You are not sure whether more correction is safe
Do not push for perfection: A 90% correction that preserves clear coat is a success. A 100% correction that burns through the clear coat is a repaint.
⚠️ The burning warning: Edges and body lines have less clear coat than flat panels. The clear coat is thinner at the edges due to how the paint flows during application. Do not linger on edges with the polisher. Do not sand edges. Burn through on an edge requires a repaint of the entire panel.
Wet Sanding — When It Actually Makes Sense
Wet sanding should be the last resort, not the first step. It removes more clear coat than compounding and carries higher risk.
When wet sanding makes sense:
- Severe deep scratches that compound cannot remove
- Factory orange peel that you want to reduce (not eliminate)
- Paint runs or dust nibs from a repaint
- Isolated defects on a single panel that are otherwise ruining the finish
When wet sanding does NOT make sense:
- Light swirls or wash marks — use polish instead
- Entire car correction — compounding is safer
- Clear coat that is already thin — you may not have enough material
- Any defect on an edge or body line
- If you are a beginner — practice on a scrap panel first
Wet sanding progression:
- Start with 1500-2000 grit (not 800-1000 unless absolutely necessary)
- Use a soft sanding block — never sand with just your fingers
- Keep the surface and paper wet at all times
- Change direction between grits — this helps remove the previous scratches
- Progress through 1500 → 2000 → 2500 → 3000
- Stop when the defect is just barely removed — do not oversand
- Follow with compound and polish to remove the sanding scratches
Wet sanding rule: If you cannot feel the scratch with your fingernail, do not wet sand it. Compound will remove it. Wet sanding removes clear coat that compound cannot remove. Only use it when compound is insufficient.
Clear Coat Peeling — Stop Polishing Immediately
If you see any of these signs, do not polish or wet sand the panel:
- Lifting clear coat — the clear is separating from the base coat
- Flaking — pieces of clear are coming off
- Peeling — large areas of clear are lifting
- Large cloudy white patches — the clear is separating
- Exposed base coat — the paint has already failed
Clear coat peeling is paint failure, not a detailing defect. Polishing it will make it worse. The repair is a repaint of the affected panels. Wet sanding peeling clear coat will remove the remaining clear and expose the base coat.
8th and 9th gen owners: Clear coat failure on dark colors is common. If the clear is already peeling on the hood, roof, or trunk, do not polish it. Save the money for a repaint.
Headlight Restoration — The Complete Process
Headlight lenses on 8th, 9th, and 10th gen Civics are made of polycarbonate plastic with a thin UV-resistant hardcoat. Over time, UV exposure breaks down this hardcoat, causing oxidation, yellowing, and hazing.
When to restore vs replace:
- Restore if: The lens is yellow, hazy, or oxidized but intact
- Replace if: The lens is cracked, has internal moisture, or the internal reflector is damaged
- Restore if: The lens is pitted but the pits are shallow
- Replace if: The pits are deep enough to catch a fingernail
Restoration process:
Step 1 — Masking: Tape the surrounding paint with multiple layers of masking tape. If you slip with the sandpaper, you will scratch the paint. Tape the entire area around the headlight — the hood, Fender, and bumper.
Step 2 — Wet sanding:
- Start with 800-1000 grit for heavy oxidation and yellowing. If the headlights are only lightly hazy, start with 1500 grit.
- Keep the sandpaper and headlight lens wet at all times. Use a spray bottle with water and a few drops of dish soap.
- Sand in one direction (horizontal) with 800-1000 grit. The lens will become uniformly matte.
- Rinse and inspect. If the yellowing is gone, move to the next grit.
- Sand with 1500 grit in the opposite direction (vertical). This removes the scratches from the previous grit.
- Sand with 2000 grit in the horizontal direction.
- Sand with 2500-3000 grit in the vertical direction.
- After 3000 grit, the lens should be uniformly matte with no visible deep scratches.
Step 3 — Polishing:
- Use a DA polisher with a felt or wool pad.
- Apply a heavy-cut compound to the pad.
- Polish the lens at speed 4-5 until the matte surface becomes clear.
- Wipe off the residue and inspect.
- Apply a finishing polish with a foam pad to remove any remaining haze.
- Wipe with IPA to remove all polish residue.
Step 4 — UV protection (the part most people skip):
A freshly sanded headlight has no UV protection. Without protection, it will yellow and oxidize again within 2-6 months. The restored surface is essentially bare polycarbonate.
Option A — 2K clear coat (best durability): Apply SprayMax 2K Clear (or similar two-component clear coat). Provides UV protection that lasts 5-7 years. Requires careful application in a dust-free environment. Do not use hardware store 1K clear coat — it will yellow within months.
Option B — Ceramic coating: Apply a ceramic coating designed for plastic (CarPro DLUX, Gtechniq C4). Provides 1.5-2 years of UV protection. Easier to apply than 2K clear but less durable.
Option C — PPF (maximum protection): Apply a clear paint protection film (Xpel, SunTek) over the restored headlight. Provides UV protection and physical protection from rock chips. Lasts 5-10 years. The best solution for daily-driven cars.
Headlight protection rule: Do not skip the UV protection step. A restored headlight without UV protection will yellow again in 2-6 months. The time and effort of sanding and polishing are wasted without a UV-resistant sealant. 2K clear coat and PPF are the most durable options. Ceramic coating is better than nothing but less durable than 2K clear.
Paint Protection After Correction
After paint correction, the clear coat is thinner than when you started. Protection is essential to preserve the work and prevent future damage.
Option A — Synthetic sealant: The easiest option. Apply a sealant like Klasse or Meguiar’s Ultimate Fast Finish. Provides 3-6 months of protection. Best for budget-conscious owners.
Option B — Ceramic coating: Apply a consumer-grade ceramic coating (CarPro CQuartz, Gtechniq CSL). Provides 1-3 years of protection. More durable than sealant and adds hydrophobicity.
Option C — PPF (Paint Protection Film): Apply PPF to high-impact areas (hood, front bumper, mirrors, rocker panels). Provides physical protection from rock chips and scratches. The most expensive option but the most effective for long-term preservation.
For Civic owners: PPF on the hood and front bumper is the most cost-effective protection. Rock chips on the leading edge of the hood are almost guaranteed on a Civic. PPF prevents them. Ceramic coating on the rest of the car provides chemical resistance and makes washing easier.
Common Mistakes
Using too much pressure: Honda clear coat is soft. Pressing down on the polisher generates heat and removes clear coat faster than the pad rotation alone. Let the pad and compound do the work.
Overworking the polish: Running the polisher for too long on one section generates heat and can burn through the clear coat. Stop when the polish begins to dust or dry out.
Polishing without tape: Compound residue is difficult to remove from textured plastic and rubber. Tape all trim before polishing.
Skipping the decontamination: Polishing without claying spreads contaminants across the paint. The contaminants become abrasive and create new scratches.
Wet sanding without measuring paint thickness: Without a paint thickness gauge, you are guessing how much clear coat you have. On a Civic, that guess can be expensive.
Expecting perfection: A 100% defect-free finish on a daily-driven Civic is unrealistic. The paint will pick up new marks over time. Correct to 80-90% and protect the car.
Using the wrong products: Do not use hardware store sandpaper on a car. Do not use rubbing compound from an auto parts store on headlights. Buy quality automotive-grade products.
Troubleshooting
| Problem | Likely Cause |
|---|---|
| Swirls remain after polishing | Using a pad that is too soft or a polish that is too mild — step up to a cutting pad and compound |
| Paint is hazy after compounding | Compound has not been refined — follow with a finishing polish |
| Pad is clogged with residue | Use a pad cleaning brush or swap to a clean pad — clogged pads do not cut properly |
| White marks on plastic trim | Compound residue is embedded in the texture — use a plastic trim restorer or remove with a toothbrush and IPA |
| Headlights are cloudy after sanding | Not enough polishing — compound with a wool pad should restore clarity |
| Headlights yellow again after a few months | UV protection was skipped or insufficient — use 2K clear, ceramic coating, or PPF |
| New scratches appear after washing | Wash technique is causing the damage — use two-bucket method and a clean mitt |
Cost Breakdown
| Service | DIY Cost | Professional Cost |
|---|---|---|
| Basic paint correction (one-step) | $50–$100 (products) | $300–$600 |
| Two-stage correction (compound + polish) | $100–$200 (products) | $600–$1,200 |
| Wet sanding + correction (single panel) | $30–$60 | $150–$400 |
| Headlight restoration (DIY kit) | $20–$40 | N/A |
| Headlight restoration (proper sanding + 2K clear) | $50–$100 | $100–$250 |
| PPF (hood + front bumper) | $200–$400 (pre-cut kit) | $600–$1,500 |
| Ceramic coating (consumer grade) | $100–$200 | $500–$1,500 |
Best Approach by Civic Condition
| Condition | Recommended Approach |
|---|---|
| 2006–2011 neglected 8th gen | Decontamination → test spot → compound/polish (if clear coat is intact) → protection. Stop if clear coat is peeling. |
| 2012–2015 daily driver | One-step correction (medium pad + polish) → sealant or ceramic coating |
| 2016–2021 with dealer swirls | DA one-step or medium correction (DA polish) — compound/polish |
| 2022+ low-mile Civic | Light polish only — do not overcorrect. Protection is the priority. |
| Oxidized headlights (any generation) | Wet sand (1500-3000) → polish → 2K clear or PPF |
| Clear coat peeling (any generation) | Do not polish. Repaint is required. |
Frequently Asked Questions
Can I wet sand Honda Civic factory paint?
Yes, but only if the clear coat is thick enough and the defect requires it. Wet sanding removes 5-10 microns of clear coat per grit step. If you do not have a paint thickness gauge, do not wet sand. A mistake will cost you a repaint.
Is Honda clear coat soft?
Yes. Honda clear coat is softer than German or American clear coats. This means swirls are easy to remove — but it also means they are easy to create. Use gentle products and techniques.
How many times can I polish a Civic?
It depends on how much clear coat is removed each time. If you use a finishing polish with a foam pad, you remove very little clear coat and can polish many times. If you use a compound and a cutting pad, you remove more clear coat. Limit heavy corrections to 2-3 times over the life of the car.
Should I use compound or polish first?
Always use polish first. If the polish removes the defects, stop. Only use compound if the polish is insufficient. Compound removes more clear coat and should not be the default.
Do I need a DA polisher?
For paint correction — yes. Hand polishing is not effective for removing swirls and scratches. A DA polisher is safer than a rotary for Honda clear coat.
Can wet sanding remove deep scratches?
Deep scratches that catch a fingernail cannot be fully removed by wet sanding without removing too much clear coat. They can be reduced but not eliminated. The safe answer is to touch up deep scratches and accept the imperfection rather than risking a burn-through.
How do I fix clear coat peeling?
Clear coat peeling is paint failure. The affected panel must be repainted. Polishing or sanding will not fix peeling clear — it will make it worse.
Why is my Civic paint fading?
UV exposure breaks down the clear coat over time. The clear coat oxidizes and turns cloudy or white. The only fix is paint correction or repaint. Prevention is UV protection — sealant, ceramic coating, or PPF.
Can I restore cloudy Civic headlights?
Yes — cloudy and yellow headlights can be restored with wet sanding and polishing. After restoration, UV protection is essential. Without UV protection, they will yellow again in 2-6 months.
What grit should I use on headlights?
Start with 800-1000 grit for heavy oxidation. Start with 1500 grit for light haze. Progress through 1500 → 2000 → 2500 → 3000 before polishing. Always use wet sanding paper and keep the lens wet.
Quick Reference Checklist
☐ Identify the defect — swirl, scratch, oxidation, or clear coat failure
☐ Decontaminate the paint — wash, iron remover, clay bar before polishing
☐ Start with the least aggressive method — polish before compound, compound before wet sanding
☐ Test spot — test on a 2×2 foot area before working on the whole car
☐ Tape trim — mask all rubber, plastic, and edges
☐ DA polisher for paint — safer than rotary for Honda clear coat
☐ Wet sand only when necessary — and only if you have measured paint thickness
☐ Stop at 80-90% correction — preserving clear coat is more important than perfection
☐ Headlight restoration: wet sand → polish → UV protection (2K clear, ceramic, or PPF)
☐ Clear coat peeling is paint failure — do not polish; repaint is required
☐ Apply protection after correction — sealant, ceramic coating, or PPF
Sources: 3M technical documentation (paint correction and headlight restoration systems), Sonax product guides, CarPro application instructions, Xpel and SunTek PPF technical documentation, CivicX forum owner reports (8th–10th gen paint correction and headlight restoration threads), professional detailing industry standards. Prices are approximate and may vary by retailer and region.