

If your Civic looks dull, covered in spiderwebs, or the headlights have turned into hazy yellow bricks, you are sitting on a few hundred dollars’ worth of DIY potential. Professional detailing in the US runs $800–1,500 for a proper two-stage correction, and most shops charge another $150–300 to bring headlights back from the dead. The truth is, Honda’s clear coat is thin and fragile, but with the right technique and a DA polisher from Harbor Freight or Amazon, you can knock out 80% of the defects in a weekend without burning through the paint.
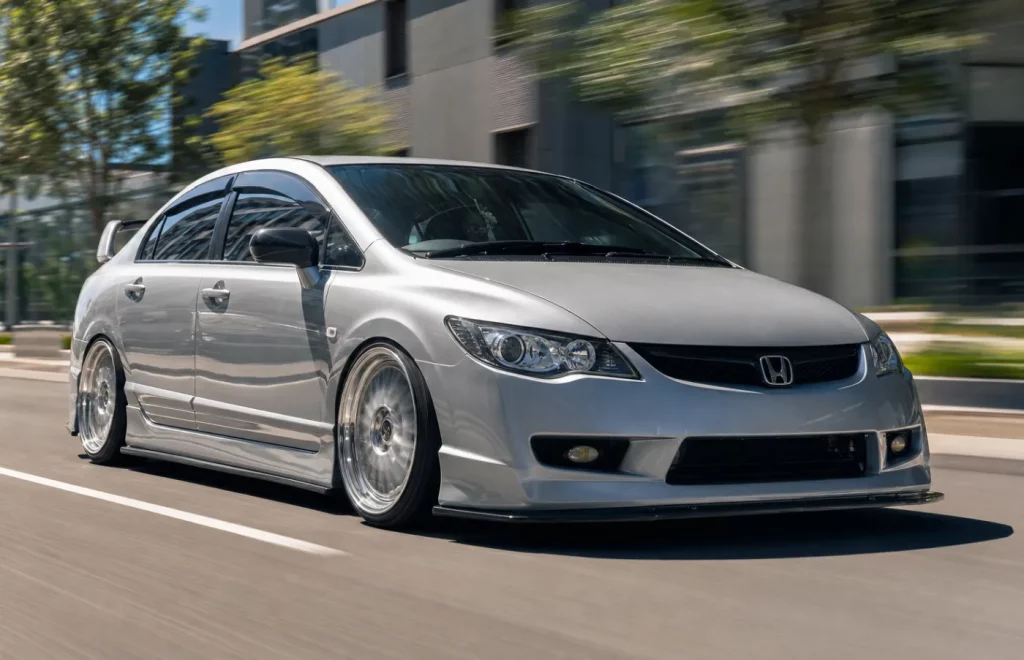
This guide covers two jobs that belong together: paint correction for swirls and oxidation, and headlight restoration for yellowed, hazy, or crazed polycarbonate lenses. The goal is not concours perfection — it is getting a daily-driven Civic looking sharp again without dropping a grand AT a detailing studio.
Quick Answer — Can You DIY This?
Paint correction: Yes, if the clear coat is intact and you are willing to learn. A DA polisher with the right pads and a diminishing abrasive polish will clean up most swirls and light scratches. Skip the rotary buffer — Honda clear is soft, and a rotary will burn through edges before you know what hit you.
Headlight restoration: Yes, but polishing alone is not a permanent fix. Yellowed or hazy lenses need wet sanding to remove the failed UV layer, followed by compounding and a new UV-protective coating. Stop after polishing, and the haze comes back in 60–90 days. That is the rule.
The rule of Civic paint: The factory clear coat on 8th through 11th gen Civics is thin — roughly 30–35 microns. Aggressive cutting compounds and heavy pad pressure will take you straight to the base coat. Work light, work slow, and always start with the least aggressive method.
What Paint Correction Actually Does
Paint correction removes or reduces:
- Swirl marks from automatic car washes
- Light scratches and micro-marring
- Oxidation and water spots
- Washing-induced defects
It does not fix: deep scratches that catch a fingernail, peeling clear coat, rust, dents, or missing paint. If the clear is flaking or the primer is showing, that is body shop territory, not a polisher job.
Scratch Test — The Fingernail Rule
Run your fingernail across the scratch. If the nail catches, the scratch is too deep for compound. You can reduce its appearance by rounding the edges, but it will not disappear. If the nail glides over it, a polish or compound will take it out.
Paint Correction vs Wax vs Ceramic
| Product / Process | Corrects Defects | Protects Paint |
|---|---|---|
| Wax | ❌ | ✓ |
| Sealant | ❌ | ✓ |
| Ceramic Coating | ❌ | ✓✓ |
| Polish | ✓ | Limited |
| Compound | ✓✓ | ❌ |
| Paint Correction | ✓✓✓ | ❌ |
Ceramic coating does not replace paint correction. It locks in whatever condition the paint is in. If the paint is swirled, the coating makes the swirls permanent until they are polished out.
When NOT to Polish a Civic
Put the polisher down if any of these are true:
- Clear coat is peeling or flaking
- Paint is heavily oxidized and chalky
- The panel has been poorly repainted with cheap clear
- Deep scratches expose primer or bare metal
- Rust is visible anywhere on the panel
- The paint has already been corrected multiple times — there may not be enough clear left
Polishing over failing clear will make it worse. The heat and abrasion will lift the edges of the peeling area and turn a small spot into a much bigger problem.
Pre-Inspection Checklist
Before turning on the polisher:
- Check paint thickness if you have a gauge (optional but helpful)
- Inspect clear coat for signs of failure — cloudiness, micro-cracking, peeling
- Note all scratches, chips, and water spots
- Check for previous bodywork — resprays often have softer clear that cuts faster
- Take before photos — you will want them for comparison
Wash → Decontaminate → Clay
This is not optional. Polishing a dirty car turns the pad into sandpaper.
- Wash with a strip wash to remove old wax and sealants
- Chemical decontamination — iron remover to dissolve brake dust and industrial fallout
- Clay bar with lubricant to pull out bonded contamination (tar, tree sap, overspray)
- Dry the car completely
- Mask all trim, rubber seals, window edges, and plastic grilles with painter’s tape
Do not skip the clay. Contamination embedded in the paint will get dragged across the surface by the polisher and create deep scratches that require a second correction step.
DIY Arsenal — What to Buy on Amazon
Dual Action (DA) Polisher: Griot’s Garage G9, Bauer from Harbor Freight, or Maxshine M8S. These are safe for beginners because the spinning head stops when pressure is too high or the surface curves sharply — no burn-through.
Pads:
- Orange / Green — medium cutting pad
- White / Black — finishing pad
- Microfiber cutting pad — for heavier defects (use with caution on Honda clear)
Liquids:
- Compound: Meguiar’s M105, 3D One, Sonax CutMax
- Polish: Sonax Perfect Finish, Meguiar’s M205, 3D One (it works as a one-step)
- Panel wipe: Isopropyl alcohol diluted 50/50 with distilled water
Consumables:
- Microfiber towels — at least 20, good quality
- Painter’s tape (3M green or yellow)
- Pad brush to clean pads on the fly
DA vs Rotary — The Short Answer
DA polisher: Choose this. It is forgiving, safe for thin Honda clear, and can handle 90% of what a daily Civic needs.
Rotary buffer: Faster cutting, but generates more heat and removes clear aggressively. One mistake on a sharp edge like the hood crease or Fender lip and you are looking at paint touch-up. Do not use it unless you have experience.
The Test Spot — Never Skip This
Start on a 2×2 foot section, typically in the center of the Hood or the rear quarter panel.
- Start with the least aggressive combination: finishing pad + finishing polish
- Run the DA at speed 4–5, make 4–5 slow passes in a cross-hatch pattern
- Wipe clean with IPA mix and inspect
- If 80% of the defects are gone, stop — that is your setup
- If not enough correction, step up to a medium cutting pad + same polish
- If still not enough, move to a cutting pad + compound
Always start gentle. You can always add more aggression. You cannot put clear coat back on.
One-Step vs Two-Step Correction
One-step: A single product (like 3D One) with a medium pad. Cleans up light swirls and adds gloss. Perfect for a daily-driven Civic.
Two-step: Compound + cutting pad to remove defects, then polish + finishing pad to refine gloss. For heavily swirled or oxidized paint.
For most 10th and 11th gen Civics, one-step is enough. For older 8th and 9th gens that have never been corrected, two-step may be necessary.
Paint Correction Process Flow
- Wash
- Decontaminate (iron remover)
- Clay
- Dry
- Mask trim
- Test spot
- Cut (if needed)
- Polish
- IPA panel wipe
- Inspect
- Protect (sealant, wax, ceramic, or PPF)
How Much Clear Coat Should You Remove?
More correction is not always better. Honda’s clear is thin — typically 30–35 microns. Each aggressive correction removes 2–5 microns depending on the pad and compound. A second or third correction on the same panel can put you dangerously close to the base coat.
Aim for 80–90% defect removal, not 100%. Chasing perfection on a daily-driven Civic often means removing more clear than is wise. The car will look great, and you will preserve the paint for years to come.
Dealing With Deep Scratches
Clear coat scratch: Can be reduced or removed with compound.
Through-paint scratch: Touch-up paint is the only fix. You can polish the touch-up flat after it cures, but the scratch will still be visible.
Primer or metal exposed: That is a body shop repair. Polish will not help, and it may make the surrounding clear thinner.
Civic Paint by Generation
8th Gen (2006–2011): Age is the main issue. Clear coat may already be thin from previous corrections or UV exposure. Inspect carefully. Do not compound aggressively.
9th Gen (2012–2015): Many of these have seen parking lot abuse and automatic car washes. Good candidates for one-step or light two-step correction.
10th Gen (2016–2021): The L15B7 cars often have factory orange peel and light swirls from dealer washes. One-step correction yields excellent results.
11th Gen (2022+): Usually only needs light polishing. If the car is new, consider PPF or ceramic after correction to keep it clean.
Headlights — Why They Turn Yellow
The factory UV coating on polycarbonate headlights breaks down from sunlight, heat, and road debris. Once the coating fails, the plastic beneath oxidizes and yellows. Honda headlights on 8th, 9th, and 10th gen cars are notorious for this — especially in Sun Belt states where UV exposure is intense.
Yellowed headlights reduce light output by 50–60%. That is a safety issue on dark interstates and back roads.
Polish First or Sand First?
Light haze or very mild yellowing: Try a plastic polish with a foam pad. If it clears up, you are done (but still need UV protection).
Heavy yellowing, cloudiness, or crazing: Wet sanding is required. The damaged layer needs to be physically removed before polishing.
Peeling or flaking UV coating: Strip the entire failed layer. Sanding is mandatory.
Wet Sanding — Step by Step
Mask the area: Cover the bumper, fenders, and hood with painter’s tape — 3–4 layers thick around the headlight edges. Your hand will slip, and the tape protects the paint.
Starting grit depends on condition:
- Severe yellowing / crazing: 600 or 800 grit
- Moderate haze: 1000 or 1500 grit
- Light oxidation: 2000 grit
Sanding sequence:
- Spray the lens with soapy water (lubricant)
- Sand in one direction — horizontal strokes
- Wipe clean and inspect
- Move to the next grit — sand vertically to cross-hatch and remove previous scratches
- Progressive grits: 600 → 800 → 1000 → 1500 → 2000 → 2500/3000 (optional)
- Each step should remove the scratches from the previous step
Do not sand dry. Water carries away plastic dust and prevents clogging. Without lubrication, the abrasive loads up and scratches unevenly.
When the Headlight Turns Cloudy — Don’t Panic
After wet sanding, the lens will look matte, cloudy, and terrible. That is the point. You are looking at finely abraded plastic with no surface reflections. The cloudiness should be uniform — no yellow patches, no deep scratches remaining.
If you see yellow streaks or deep grooves, you did not sand evenly or you skipped a grit. Go back one step and work it again.
Polishing the Headlight
After sanding, apply compound to a cutting pad and polish the lens with your DA or by hand. The matte finish should turn crystal clear in a few passes. Wipe clean with IPA to remove polishing oils.
By hand: Use a microfiber pad and plastic polish. It takes longer but works for small areas.
With DA: Faster and more even. Use a foam cutting pad and a light compounding polish. Keep the speed moderate — too fast and you risk melting the plastic.
UV Protection — The Most Important Step
Do not stop after polishing. The factory UV coating is gone. Bare polycarbonate will yellow again in 60–90 days under strong sunlight.
The US garage rule: Restoration without protection is just wasting time. Polished headlights without UV sealant are a temporary cosmetic fix. Seal them or they will look worse than before within a year.
Option A — 2K Clear Coat (SprayMax): Professional-grade UV protection that lasts 5–7 years. Requires careful spraying to avoid runs. Hard to reverse if you mess up.
Option B — Ceramic Coating (CarPro DLUX / Cerakote): Easy to apply, lasts 1.5–2 years. Less durable than 2K but much easier for a beginner.
Option C — PPF (Xpel, SunTek): The long-term solution. After sanding and polishing, apply optically clear PPF over the headlight. Blocks UV permanently, protects against rock chips, and lasts 7–10 years. This is the best option if you want to do the job once and never think about it again.
PPF on Restored Headlights
If you go the PPF route:
- Wait until the headlight is fully polished and wiped clean
- Apply the film using the standard PPF installation method
- The film will hide minor imperfections and keep the lens clear for years
- Replacement PPF headlight kits are available for 8th, 9th, 10th, and 11th gen Civics
This approach connects directly to the PPF Coverage Guide. Restored headlights are the perfect candidate for PPF — the lens is perfectly smooth, and the film locks in that condition permanently.
Headlight Restoration vs Replacement
Restore if:
- The lens is yellow, hazy, or oxidized
- Surface scratches are cosmetic
- The housing is intact and sealed
- You want to keep the OEM fitment
Replace if:
- The lens is cracked or broken
- The housing has moisture inside
- The reflector or projector is damaged
- Mounting tabs are broken
- Internal haze cannot be reached from outside
Do not spend three hours restoring a headlight that costs $80–150 to replace with a quality aftermarket unit. Check the price for your specific Civic before starting the sanding process.
DIY Cost Breakdown
| Job | DIY Cost (New Tools) | DIY Cost (Tools Already Owned) |
|---|---|---|
| Paint Correction (One-Step) | $150–250 | $40–80 |
| Paint Correction (Two-Step) | $180–300 | $60–120 |
| Headlight Restoration (Sand + Polish) | $30–60 | $15–30 |
| Headlight Restoration with 2K Clear | $50–80 | $35–50 |
| Headlight Restoration with PPF | $60–120 | $45–90 |
Professional Cost Comparison
| Service | Professional Detailer | DIY Savings |
|---|---|---|
| One-Step Paint Correction | $300–600 | $150–450 |
| Two-Step Paint Correction | $600–1,200+ | $450–1,000+ |
| Headlight Restoration (Pair) | $150–300 | $100–250 |
| Headlight Restoration + PPF | $300–500 | $200–400 |
Best DIY Setup by Civic Generation
| Generation | Paint Correction | Headlight Restoration |
|---|---|---|
| 8th Gen (2006–2011) | Two-step if clear is intact, otherwise seal | Almost always needed — sanding required |
| 9th Gen (2012–2015) | One-step or light two-step | Frequently needed — moderate sanding |
| 10th Gen (2016–2021) | One-step with finishing polish | Condition dependent — light sanding or polish |
| 11th Gen (2022+) | Light one-step or prep for PPF | Usually preventative PPF or ceramic |
Should You Do Both at Once?
Yes. If the car is already in the garage for a full wash, decon, and clay, the additional time to correct the headlights is minimal. However:
- Do the headlights first — sanding slurry can splash onto painted panels
- Mask the surrounding paint before starting
- Finish the headlights completely before moving to paint correction
- Seal the headlights first, then apply protection to the paint
Mistakes That Ruin DIY Results
- Polishing a dirty or contaminated car
- Skipping the clay bar step
- Using an aggressive compound when a polish would work
- Overheating the paint — keep the DA moving and check panel temperature by hand
- Staying too long on a single spot
- Polishing through the clear coat on sharp edges
- Wet sanding headlights dry or without enough water
- Jumping from 600 grit directly to 2000 grit
- Stopping after polishing — no UV protection
- Using standard automotive clear coat on headlights (wrong UV resistance)
- Failing to mask paint around headlights
- Touching the cleaned lens before applying coating
- Applying coating to a contaminated surface
Final Protection — What to Put On Top
Paint:
- Budget: Synthetic sealant (Jescar Power Lock, Klasse)
- Mid-range: Ceramic spray / SiO₂ sealant (CarPro Hydro2, Griot’s 3-in-1)
- Long-term: Professional ceramic coating (CQuartz, Gtechniq)
- High-impact panels: PPF
Headlights:
- DIY durable: 2K clear coat
- Easy reapplication: Ceramic coating (CarPro DLUX)
- Permanent solution: PPF
If you already read the PPF Coverage Guide, you know that PPF on headlights is the long-term play. It blocks UV, stops rock pitting, and keeps the lenses clear for years. The cost is modest compared to replacing an LED headlight unit — Touring, Si, and Type R lamps run $1,000+ per side.
FAQ
Can I polish my Honda Civic myself?
Yes, if the clear coat is intact and you use a DA polisher with the proper pads and polish. Start with a test spot using the least aggressive combination. Honda clear is thin, so work light and avoid rotary buffers.
How much does Civic paint correction cost to DIY?
If you already own a DA polisher, the consumables (pads, compound, polish, towels, tape) run $40–80. If you need to buy a polisher as well, budget $150–250 for a quality DA setup.
Is paint correction worth it on an older Civic?
Yes, if the clear coat is still in good condition. An 8th or 9th gen with original paint can look dramatically better after a one-step correction. If the clear is peeling or heavily oxidized, correction may make it worse — inspect first.
Can polishing remove scratches from a Civic?
Compound can remove scratches that are limited to the clear coat. If the scratch catches your fingernail, it is too deep for polishing alone — touch-up paint or respray is required.
How do I remove swirl marks from a Civic?
Swirl marks are removed by polishing the clear coat. A DA polisher with a finishing pad and a diminishing abrasive polish like Sonax Perfect Finish or Meguiar’s M205 will take out most swirls in a single pass.
Should I use a DA or rotary polisher on a Civic?
Use a DA polisher. Rotary buffers generate too much heat for Honda’s soft clear coat and will burn through edges and high points if you are not extremely experienced.
How much clear coat does polishing remove from a Civic?
A typical one-step correction removes 1–2 microns. An aggressive two-step with heavy compound can remove 3–5 microns. Honda clear is 30–35 microns from the factory, so be conservative with aggressive corrections.
Can I correct Honda paint by hand?
You can apply polish by hand for spot repairs, but it is not practical for an entire car. The heat and speed of a DA are required to break down diminishing abrasives and achieve a uniform finish.
Why are my Civic headlights yellow?
The factory UV coating degrades over time, leaving the bare polycarbonate exposed to sunlight. UV radiation oxidizes the plastic, turning it yellow and hazy. This is especially common on 8th, 9th, and 10th gen Civics.
Can I restore Civic headlights without sanding?
Only if the haze is very light. A plastic polish with a foam pad can clear up minor oxidation. For yellow, crazed, or heavily hazed lenses, wet sanding is required to remove the damaged plastic layer.
What grit should I use on Civic headlights?
Start with 600 or 800 for severe yellowing, 1000–1500 for moderate haze, and 2000 for light oxidation. Always progress through the grits in order — 600 → 800 → 1000 → 1500 → 2000 → 2500/3000 — and sand with water.
Why do headlights look cloudy after sanding?
That is normal. Wet sanding leaves a matte, evenly abraded surface. The cloudiness should be uniform. Polishing with compound will restore the clarity. This is the step where the magic happens.
Do I need UV coating after headlight restoration?
Yes. Without a new UV-protective layer, the bare plastic will yellow again in 60–90 days. Use 2K clear coat, a dedicated ceramic coating, or PPF to seal the lens permanently.
Can I use ceramic coating on headlights?
Yes, but use a ceramic coating designed for plastics and headlights, like CarPro DLUX or Cerakote. Standard paint ceramic coatings may not have the same UV resistance or adhesion to polycarbonate.
Is PPF better than clear coat for restored headlights?
PPF provides UV protection and physical protection against rock chips. Clear coat only protects against UV. For long-term durability, PPF is the better choice if you can install it correctly or are willing to pay for professional installation.
How long does headlight restoration last?
With 2K clear coat: 5–7 years. With ceramic coating: 1.5–2 years. With PPF: 7–10 years. Without any UV protection: 60–90 days.
Should I restore or replace Civic headlights?
Restore if the lens is yellow or hazy but the housing is intact. Replace if the lens is cracked, the housing has moisture, the reflector is damaged, or the cost of replacement is low. For 8th and 9th gen, restoration is usually the better value.
Can I restore headlights on an 8th gen Civic?
Yes, and they are prime candidates. The 8th gen (2006–2011) headlights are well-known for yellowing and crazing. Wet sanding followed by 2K clear or PPF will bring them back to new condition.
Can I restore headlights on a 10th gen Civic?
Yes. The 10th gen FC/FK cars are starting to show yellowing on higher-mileage examples. The LED-equipped Touring and Si lamps are expensive to replace, so restoration makes financial sense.
How much does DIY headlight restoration cost?
If you have the sandpaper and polish already, under $30. If you need to buy everything including 2K clear or PPF, budget $50–120 per pair. Professional restoration runs $150–300.
Final Verdict
The Bottom Line
Honda’s thin clear coat and UV-sensitive headlights make paint correction and headlight restoration two of the highest-ROI DIY jobs you can do on any Civic. For $150–250 in tools and consumables, you can skip the $800–1,500 detailer bill and bring a faded daily driver back to life over a single weekend. The key is simple: start gentle, test before you cut, and never skip UV protection on headlights.
The rule to live by: Restoration without protection is just polishing for Instagram. Seal the paint, seal the headlights, or both will degrade again. If you want to do the job once and move on, PPF on the front end and headlights is the answer.
Sources: Meguiar’s and Sonax product guides, 3M wet sanding protocols, SprayMax 2K application data, CarPro DLUX and Cerakote headlight coating instructions, Xpel PPF installation guides, Honda Civic factory service manuals, 8thCivic and CivicX forum DIY reports.