

My 2018 Civic Si had 78,000 miles on the original clutch when it started slipping in fourth gear on the highway. I had owned it since new, done every oil change on time, and never tracked it. The clutch was not supposed to be done yet. But it was. This is the story of how I replaced it in a rented garage over two days, what I got wrong, and what the second removal cost me.
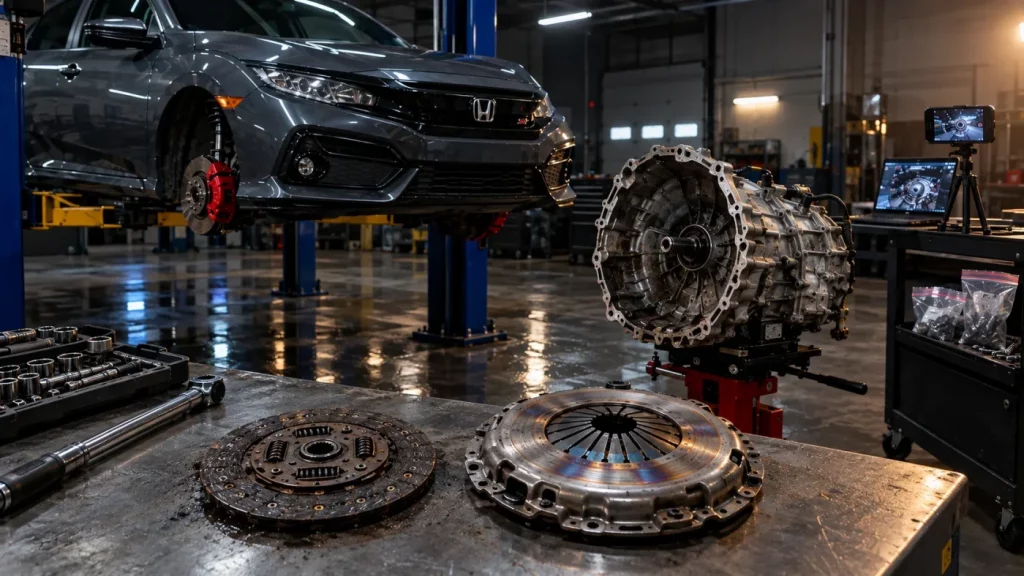
This is not a step-by-step clutch replacement guide. It is one car, one owner, one mistake, and the real numbers behind fixing it. If you are planning a clutch job on a 10th Gen Si, the value here is not the procedure — it is the list of things I would do differently.
The factory clutch on the 10th Gen Si (L15B7, 6MT) is rated for roughly 192 lb-ft at the crank. A Stage 1 tune pushes crank torque to roughly 280–300 lb-ft after driveline losses, which is well past what the stock clutch was designed to hold. Even without a tune, aggressive driving and frequent hill starts can wear the disc out by 70,000–90,000 miles. I replaced mine at 78,000 miles with an ACT Streetlite kit rated for 330 lb-ft. I also made one mistake: I did not replace the release bearing while the transmission was out. It failed 3,000 miles later and I had to remove the transmission a second time. Total cost including the second job: approximately $1,760 in parts, lift rental, and alignment — plus one wasted weekend.
1. The Symptoms — What Made Me Pull the Transmission
My Si was stock when the clutch started to go. No tune, no bolt-ons, no track days. Just daily driving and the occasional back-road pull. By 78,000 miles, three things were happening AT once.
First, the clutch pedal engagement point had moved higher. It used to bite about a third of the way up. By 78,000 miles, it was biting near the top of the pedal travel. Second, there was a faint burnt smell after any hard acceleration from a stop. Third — and this is the one that confirmed it — the engine would rev past the road speed in fourth gear under full throttle. The tach climbed, the car did not accelerate at the same rate. That is clutch slip.
Before I pulled anything, I ruled out the hydraulics. A failing clutch master or slave cylinder can mimic a worn clutch by not fully disengaging the pressure plate. I checked the fluid level, looked for leaks at the slave cylinder, and bled the system. The pedal felt normal after bleeding. The slip remained. That told me the problem was mechanical, not hydraulic.
I also checked the flywheel for hot spots by driving the car gently for 20 minutes and then feeling for chatter at idle. There was none. The flywheel was likely usable, but I decided to replace it anyway rather than resurface.
| Symptom | What It Pointed To |
|---|---|
| Engagement point moved higher | Worn clutch disc — normal wear pattern |
| Burnt smell after hard starts | Disc overheating under load |
| RPM climbs faster than speed in 4th | Clutch slip confirmed |
| No change after bleeding hydraulics | Rules out master/slave cylinder |
| No chatter at idle after warm-up | Flywheel not warped — but still replaced |
2. Why the Stock Si Clutch Dies Early
The factory clutch in the 10th Gen Si is not a performance clutch. It is a smooth, light-pedal unit designed for daily driving and fuel economy. It is rated for approximately 192 lb-ft of torque at the Crankshaft. The L15B7 in stock form makes 192 lb-ft at the crank in the Si. That means the stock clutch is operating at its design limit from day one.
Any increase in torque — a Stage 1 tune, a downpipe, an intake — pushes the clutch past what it was designed to hold. Owners on CivicX report clutch slip appearing between 5,000 and 15,000 miles after a Stage 1 tune. Some report it as early as 3,000 miles. The clutch is the first thing to go on a tuned 10th Gen Si, before the engine, before the transmission, before anything else.
My car was not tuned. But 78,000 miles of daily driving, hill starts, and the occasional aggressive pull was enough. The clutch was simply at the end of its service life.
Pro tip: If you are planning a Stage 1 tune on a 10th Gen Si, budget for a clutch at the same time. The stock clutch will not hold the crank torque a Stage 1 tune produces for long. ACT, Exedy Stage 1, and Competition Clutch all make street-friendly kits rated for 330+ lb-ft at the crank.
3. What I Ordered
I chose the ACT Streetlite kit with the HD pressure plate. It is rated for approximately 330 lb-ft of torque at the crank — more than enough headroom for a stock car and enough margin if I ever added a tune. It uses an organic Disc, which keeps pedal effort reasonable for daily driving.
I also ordered new flywheel bolts, new pressure plate bolts, an exhaust Gasket, and two quarts of Honda MTF. I did not order a new release bearing because the kit included one — but I did not install it. That decision cost me the entire job.
| Part | Cost |
|---|---|
| ACT Streetlite clutch kit (disc + HD pressure plate + alignment tool) | $720 |
| New flywheel (OEM equivalent) | $210 |
| Pilot bearing | |
| Flywheel bolts | $28 |
| Pressure plate bolts | $16 |
| Exhaust gasket | $12 |
| Honda MTF (2 quarts) | $36 |
| Total parts | $1,022 |
4. Preparation — Tools and Space
I rented a lift bay at a local DIY garage for a full weekend. That was the best decision of the entire job. Doing this on jack stands in a driveway would have been miserable and possibly unsafe. The transmission in the 10th Gen Si is not light, and dropping the Subframe to get it out requires room underneath.
Tools I used:
- Transmission jack with adjustable cradle
- Engine support bar (to hold the engine from above)
- 3/8″ and 1/2″ ratchet sets with extensions and universal joints
- Torque wrench (two — one for 20–100 ft-lbs, one for 100–250 ft-lbs)
- Long pry bars
- Ball Joint separator
- Alignment tool (came with the kit, but I also had a spare)
- Zip-top bags and a marker for labeling bolts
I also brought a phone tripod and recorded every stage of disassembly. That turned out to be one of the smartest things I did. When reassembling, I rewatched the video twice to confirm bolt locations and routing.
Pro tip: Label every bolt bag by location. The 10th Gen Si uses different-length bolts in the transmission bell housing, the subframe, and the suspension. Mixing them up causes stripped threads or worse. A marker and a handful of sandwich bags cost almost nothing.
5. Removing the Transmission — Where the Job Gets Real
The disassembly order on the 10th Gen Si is not complicated, but it is long. From the top: battery and tray, airbox and intake tube, starter, shift cables, clutch hydraulic line, and Wiring Harness connectors. From the bottom: both front wheels, splash shields, lower ball joints, axle nuts, and both axles pulled from the transmission.
The hard part is the subframe. On the 10th Gen, the transmission will not clear the subframe without either dropping the subframe partially or lowering the driver-side of the subframe enough to create clearance. I chose to drop the driver-side subframe bolts and loosen the passenger side, which gave enough clearance to angle the transmission out.
Moving the subframe and disconnecting the lower ball joints throws off the front alignment. Any time you shift the subframe or disconnect suspension geometry, you need an alignment afterward. I did not think about this until after the car was back together — and it cost me an extra $120 and a second trip to a shop.
The transmission itself weighs roughly 120 pounds. A transmission jack is not optional. I lowered it slowly, keeping the input shaft clear of the pressure plate, and slid it out from under the car on the jack.
With the transmission out, the old clutch was visible. The disc was worn down to the rivets. The pressure plate showed heat discoloration. The flywheel had visible hot spots and slight grooving. This confirmed the diagnosis — the clutch was done, not the hydraulics.
6. What I Got Wrong — The Release Bearing
The ACT kit came with a new release bearing. I inspected the old one. It spun freely, had no play, and showed no signs of wear. I decided to keep the old one installed and save the new one for later.
That was the mistake.
The release bearing on the 10th Gen Si rides on a guide sleeve on the transmission input shaft. It is lubricated at the factory and does not have a service interval. But once the transmission has 78,000 miles on it, the bearing has 78,000 miles of heat cycles on the grease. Reinstalling it with a brand-new, stiffer pressure plate (the ACT HD) adds load. The old bearing was not designed for the increased force.
I installed the new clutch and pressure plate, torqued everything to spec, reinstalled the transmission, and reassembled the car. The first drive was perfect. The pedal bit lower, the engagement was smooth, and the slip was gone.
7. Three Thousand Miles Later — The Symptom Returns
At roughly 3,000 miles after the clutch job, I noticed a faint squeal when pressing the clutch pedal in the morning. It disappeared after the car warmed up, so I ignored it for a few days.
Then the squeal became a grinding noise. Then the pedal started to feel notchy — a slight catch as it moved in and out. By the end of the week, the noise was present every time I pressed the clutch, hot or cold.
I knew what it was. The release bearing was failing. The old bearing had been carrying a load it was not designed for. Its grease had degraded, the bearing was running dry, and it was now grinding on the guide sleeve.
The only fix was to remove the transmission again.
8. The Second Removal — And What It Cost
The second removal was faster. I knew the sequence, I had labeled every bolt bag, and I had the video from the first job. It took me about six hours instead of two days.
With the transmission out, the damage was clear. The release bearing was rough when spun by hand. The guide sleeve on the input shaft showed scoring — the bearing had been grinding metal against metal. The clutch fork had minor wear where it contacts the bearing, but it was still serviceable.
I replaced the release bearing with the new one from the ACT kit, replaced the guide sleeve, and installed a new clutch fork while I was in there. I also replaced the pressure plate bolts and re-torqued everything.
| Second Job Part | Cost |
|---|---|
| Release bearing (from original kit — no charge) | $0 |
| Guide sleeve | $42 |
| Clutch fork | $86 |
| New pressure plate bolts | $16 |
| New flywheel bolts | $28 |
| Honda MTF (2 quarts) | $36 |
| Lift rental (one day) | $120 |
| Total second job | $328 |
If I had installed the release bearing during the first job, I would have spent $0 extra on parts and saved an entire weekend of labor. Instead, I spent $328 and gave up a second weekend to fix a mistake that cost nothing to prevent.
9. What the Job Actually Cost
| Category | Planned | Actual |
|---|---|---|
| Clutch kit | $720 | $720 |
| Flywheel | $210 | $210 |
| Pilot bearing, bolts, gaskets, fluid | $110 | $110 |
| Release bearing, guide sleeve, clutch fork (second job) | $0 | $154 |
| Extra fluids and bolts (second job) | $0 | $80 |
| Lift rental (first weekend) | $240 | $240 |
| Lift rental (second day) | $0 | $120 |
| Alignment (required after subframe drop) | $0 | $120 |
| Total | $1,280 | $1,754 |
For comparison, a shop would have charged $1,800–$2,500 for the clutch job with parts and labor. My DIY total of $1,754 is still cheaper than the shop quote, but it is $474 more than it should have been because of one decision — and one procedure I forgot to plan for.
10. How the Clutch Behaves Now
I have driven roughly 12,000 miles since the second job. The pedal effort is slightly higher than stock — that is expected with the ACT HD pressure plate. The engagement point is lower and more precise. There is no slip in any gear, no chatter at idle, and no noise when pressing the pedal.
The clutch holds full throttle in fourth and fifth gear without any sign of slipping. If I ever add a tune, the clutch has enough headroom to handle it. That was the point of buying the ACT kit instead of an OEM replacement.
One thing worth noting: the ACT Streetlite flywheel is a single-mass unit. It is slightly lighter than the factory dual-mass flywheel, which means the engine revs a little faster and there is slightly more gear noise at low RPM. It is not objectionable, but it is different from stock. If you want the factory feel, keep the dual-mass flywheel and have it resurfaced.
11. What I Would Do Differently
- Replace the release bearing, no matter how good it looks. It is a $40 part that costs a second transmission removal if it fails. There is no reason to reuse it.
- Replace the guide sleeve and clutch fork at the same time. They are wear items on a high-mileage transmission, and they are only accessible with the transmission out.
- Replace the rear main seal while the transmission is out. It is a $20 part and a known leak point on high-mileage L15B7 engines. Doing it during the clutch job costs nothing extra in labor.
- Buy new bolts for everything. The pressure plate bolts and flywheel bolts are torque-to-yield on some applications. New bolts cost $44 total and remove any doubt.
- Use a lift, not jack stands. The transmission weighs 120 pounds and the subframe must be partially dropped. Doing this on the ground is unsafe and miserable.
- Record every step of disassembly on video. The reassembly is where mistakes happen. A 15-minute video of the disassembly saved me an hour of guessing during reassembly.
- Budget for an alignment. Any time you drop the subframe or disconnect suspension geometry, you need a front-end alignment afterward. Plan for $80–$120 and schedule it before the job is done.
12. What the Community Says
This is a well-known pattern on CivicX. The advice is consistent and repeated across dozens of threads: replace everything while the transmission is out. Release bearing, clutch fork, guide sleeve, rear main seal — all of it. The parts cost $150–$250 total. The alternative is a second transmission removal at $300–$600 in labor or a wasted weekend if you DIY.
The stock Si clutch is not a performance clutch. It is designed for 192 lb-ft at the crank and it holds exactly that. If you tune the car, you need a clutch rated for at least 300 lb-ft at the crank. ACT, Exedy Stage 1, and Competition Clutch all make kits that fit this requirement. The ACT Streetlite kit I used has been reliable for 12,000 miles and shows no signs of wear.
Pro tip: If you are paying a shop to do the clutch job, ask them to replace the release bearing, clutch fork, and rear main seal at the same time.
The extra parts cost $150–$250. The extra labor is zero because the transmission is already out. Skipping any of them risks paying for the job twice.
13. Cost Comparison — DIY vs Shop
| Scenario | Parts | Labor | Total |
|---|---|---|---|
| DIY, single removal (no mistakes) | $1,040 | $240 lift + $120 alignment | $1,400 |
| DIY with release bearing mistake | $1,194 | $360 lift + $120 alignment | $1,674–$1,754 |
| Independent shop, single removal | $1,100 | $700–$1,200 | $1,800–$2,300 |
| Honda dealer, single removal | $1,300 | $1,200–$1,500 | $2,500–$2,800 |
The DIY job is cheaper even with the mistake. But the mistake cost me an extra $328 and a second weekend. If you are paying a shop, the cost of the mistake is far higher — a second transmission removal at shop rates adds $700–$1,200 to the job.
14. Should You Do This Job Yourself?
If you have access to a lift, a transmission jack, an engine support bar, and a full weekend, yes. The 10th Gen Si clutch job is not technically difficult, but it is long and physical. The transmission is heavy and the subframe must be partially dropped. Doing this on jack stands is possible but not recommended.
If you do not have a lift or a transmission jack, pay a shop. The job is not worth doing on the ground. The risk of injury or damage to the transmission is too high.
If you do it yourself, replace everything while the transmission is out. The parts are cheap. The labor of a second removal is not.
Important: The 10th Gen Si uses a dual-mass flywheel from the factory. If you replace it with a single-mass flywheel, expect slightly more gear rattle at low RPM and a slightly faster revving engine. This is normal and not a defect. If you want to keep the factory feel, have the original dual-mass flywheel resurfaced instead of replacing it. Check with a machine shop first — not all dual-mass flywheels can be resurfaced.
FAQ — 10th Gen Civic Si Clutch Replacement
How long does a 10th Gen Civic Si clutch last?
The factory clutch typically lasts 70,000–100,000 miles on a stock car driven normally. With a Stage 1 tune or aggressive driving, it can fail as early as 30,000–50,000 miles. The stock clutch is rated for 192 lb-ft at the crank — exactly what the stock engine produces. Any increase in crank torque shortens its life significantly.
Should I replace the release bearing with the clutch?
Yes, always. The release bearing is a wear item that is only accessible with the transmission removed. It costs $40–$60. If it fails after a clutch job, you have to remove the transmission again, which costs $300–$1,200 in labor or a wasted weekend if you DIY. There is no reason to reuse it.
How hard is it to replace the clutch on a Civic Si?
The job is not technically difficult, but it is long and physical. It requires removing the battery, intake, starter, axles, shift cables, clutch hydraulics, and partially dropping the subframe to get the transmission out. The transmission weighs approximately 120 pounds. A lift and a transmission jack are strongly recommended. Budget two full days for a first-time DIY job.
How much does a clutch replacement cost for a Civic Si?
Parts for a DIY job run $700–$1,100 for an aftermarket clutch kit, flywheel, and consumables. A lift rental adds $120–$240. A front-end alignment after the subframe drop adds $80–$120. A shop charges $1,800–$2,500 for parts and labor. A Honda dealer charges $2,500–$2,800. The DIY job saves $600–$1,200 if you have access to the right tools and space.
Do I need to replace the flywheel with the clutch?
Not always. If the flywheel is in good condition — no hot spots, no cracks, no deep grooves — it can be resurfaced. However, on a dual-mass flywheel, resurfacing is not always possible. If the flywheel shows heat discoloration or the dual-mass mechanism has play, replace it. A new flywheel costs $200–$350.
What else should I replace while the transmission is out?
Release bearing, clutch fork, guide sleeve, and rear main seal. These are all wear items that are only accessible with the transmission removed. The total parts cost is $150–$250. Doing them all at once prevents a second transmission removal later.
Do I need an alignment after a clutch job?
Yes, if you dropped the subframe or disconnected the lower ball joints — which you almost certainly did on a 10th Gen Si. Moving the subframe shifts the front-end geometry and throws off camber, caster, and toe. Without an alignment, you will wear the front tires unevenly and the car may pull. Budget $80–$120 and schedule it right after the job is done.
Can a bad clutch master cylinder mimic a worn clutch?
Yes. A failing master or slave cylinder can prevent the clutch from fully disengaging, which causes hard shifting or slipping. Before replacing the clutch, check the hydraulic system for leaks, bleed the system, and verify the pedal feels normal. If the pedal is firm and the slip remains, the problem is mechanical.
What is the best clutch for a tuned 10th Gen Civic Si?
Any clutch rated for 300+ lb-ft at the crank. The ACT Streetlite, Exedy Stage 1, and Competition Clutch Stage 2 are the three most common options in the CivicX community. Organic discs are better for daily driving. Ceramic discs hold more torque but are noisier and have a harsher engagement.
Does the 10th Gen Si have a dual-mass flywheel?
Yes. The factory flywheel is a dual-mass unit designed to smooth out driveline vibrations. If you replace it with a single-mass flywheel, expect slightly more gear rattle at low RPM and slightly faster engine revs. This is normal. Some owners prefer the single-mass feel, others prefer the stock smoothness.
How do I break in a new clutch?
Most manufacturers recommend 500 miles of city driving with no full-throttle starts, no slipping, and no towing. Vary the RPM and avoid highway cruising at a constant speed for the first 100 miles. After 500 miles, gradually increase load. The clutch engagement will improve over the first 1,000 miles.